Veröffentlicht am
HOW TO CHANGE AND INSTALL A TPU TUBE
Changing and installing a TPU tube? Here’s how it’s done! We’ll explain what to watch out for and how to do it quickly and easily.
Changing a bicycle tube is one of the basic maintenance tasks every cyclist should know. A flat tire caused by punctures or so-called snakebites (pinch flats) can happen at any time. Being able to change a tube saves time, avoids unnecessary costs, and can even save your ride—or your entire trip. Even tubeless riders should know how to change a tube, as holes in the tire casing that sealant can’t fix are not uncommon. In such cases, a tube is the alternative to tubeless plugs.
Many cyclists already know how to change a standard butyl or latex tube. But what about TPU tubes (TPU = Thermoplastic Polyurethane), like the Airtubes from AERON/TPU? Is the process the same or different? We’ve put together a step-by-step guide to show you how to change TPU tubes and what to watch out for compared to butyl tubes.
Tools and Materials You’ll Need
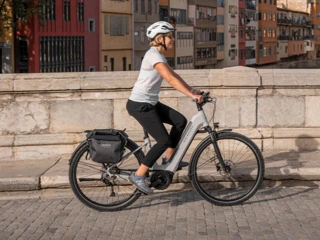
Before you start changing an AERON/TPU tube, here’s what you should know: AERON/TPU Airtubes are available for nearly all types of bikes—whether you need TPU tubes for road bikes, mountain bikes (MTB), gravel bikes, trekking bikes, or even city and e-bikes. AERON/TPU offers lightweight TPU tubes with excellent puncture protection. They also have low rolling resistance and a compact pack size, making them ideal for bikepacking or even jersey pockets.
Before replacing or installing a TPU tube, make sure you have the following tools ready:
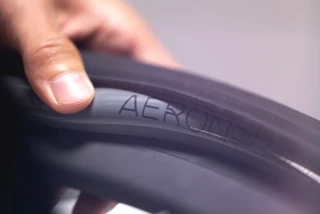
1. AERON/TPU Bicycle Tube
The replacement tube must match your tire size. You’ll find size info on the tire sidewall and the tube packaging.

2. Tire Levers
These are essential for removing the tire from the rim without damage. Usually sold in sets of three, but two are often enough.

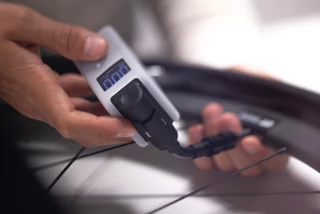
3. Air Pump
Make sure the pump head is compatible with your valve type (Schrader, Presta, or Dunlop).
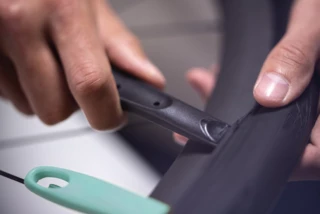
4. Patch Kit (optional)
If you don’t have a new tube, you can patch the old one. Note: For AERON/TPU tubes, you’ll need a special repair kit—more info in this article.

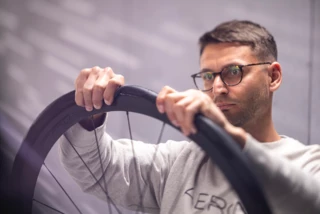
How to Change an AERON/TPU Tube
If you’re familiar with changing standard butyl tubes, you already have most of the skills needed. However, TPU (thermoplastic polyurethane) requires a few extra considerations. Here’s a step-by-step guide:
1. REMOVE THE WHEEL
If changing the rear tube, shift to the smallest cog. This makes wheel removal easier. Open the quick release or loosen the axle nuts, then remove the wheel from the frame.
2. DEFLATE THE TIRE
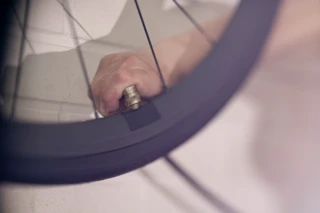
If there’s still air in the tire, release it completely. Press the valve pin (Schrader) or unscrew the valve core nut (Presta). Press on the tire to ensure all air is out.
3. REMOVE THE TIRE FROM THE RIM
Use tire levers to pry the tire bead over the rim edge. Start with one lever, then place the second about 10 cm away. Slide the lever along the rim to fully unseat one side of the tire. Use a third lever if needed.
4. REMOVE THE TUBE
Pull the valve out of the rim hole (you may need to unscrew a valve nut first), then remove the tube. Check both the tube and tire for sharp objects, such as glass or thorns. Pay special attention to the inside of the tire. Also, inspect the rim tape—if damaged, the new tube could be punctured by the spoke holes.
5. PREPARE THE NEW TUBE
Slightly inflate the new tube to give it shape. Important: TPU tubes should only be inflated to a maximum of 0.3 bar before installation. Overinflating can cause deformation or bubbles.
6. INSERT THE NEW TUBE
Insert the valve through the rim hole, ensuring it stands straight. Place the tube evenly inside the tire without twisting.
7. RE-SEAT THE TIRE
Start at the valve and work your way around the tire, pushing the bead back onto the rim. Use your hands first; if needed, use tire levers carefully to avoid pinching the tube.
8. INFLATE THE TIRE
Once the tire is fully seated, begin inflating. After a few pumps, massage the tire on both sides to ensure the tube isn’t pinched. Inflate to the recommended pressure (found on the tire sidewall). For Presta valves, tighten the valve nut after inflating. Make sure the tire is seated evenly to avoid wobbling—check the alignment using the guideline on the tire.
9. REINSTALL THE WHEEL
Place the wheel back into the frame. For the rear wheel, make sure the chain is on the smallest cog. Secure the wheel by tightening the nuts, quick-release lever, or thru-axle, depending on your bike.
10. CHECK THE BRAKES
Ensure that the brakes are functioning correctly after reinstalling the wheel and that the wheel spins freely without rubbing.
11. TEST RIDE
Before heading out on a full ride, take a short test ride to make sure everything is working correctly. Pay special attention to tire pressure and that the wheel is securely mounted.
Conclusion
With this step-by-step guide, you should be well-equipped to change an AERON/TPU bicycle tube on your road bike, mountain bike, gravel bike, or city bike. With a bit of practice, this process becomes a quick and easy routine that can save you a lot of time and hassle. It goes without saying that on any longer ride, you should always carry a spare tube, tools, tire levers, a patch kit, and a pump.
Product Series
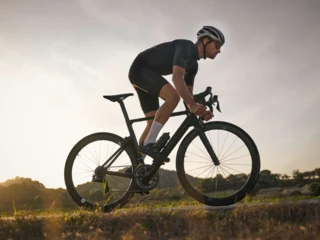
ROAD SERIES
Ultra-light, super-fast and mega-compact: AERON/TPU road bike tubes are trimmed for maximum performance. Depending on the discipline and intended use, they guarantee you the perfect set-up with a focus on maximum weight saving and minimum rolling resistance or outstanding puncture protection.
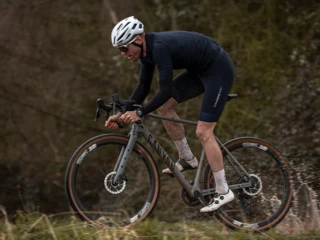
CX/GRAVEL SERIES
TPU technology, perfectly designed for off-road use: Lightweight, puncture-proof, low rolling resistance and the smallest pack size. AERON/TPU offers high-performance tubes for gravel and cyclocross racers as well as variants with maximum puncture protection for bikepackers and ultra-riders.
MTB SERIES
Tech for trails: AERON/TPU provides the perfect tube technology for mountain bikers with the best compromise between lightness, puncture resistance and low rolling resistance. Specific models offer you the perfect tube for your favourite mountain bike discipline, depending on your preferred terrain or riding style.

CITY/TOUR SERIES
Developed for bikers who want maximum reliability in everyday use. AERON/TPU tubes for city and touring are characterised by optimised puncture protection. Their low weight and low rolling resistance also increase performance and the fun factor on every tour.